
Applies to: Reolink PoE NVRs.
There are several possible causes for Email Test failed when configuring email settings on Reolink PoE NVRs. You may follow the troubleshooting tips listed below to solve the problem.
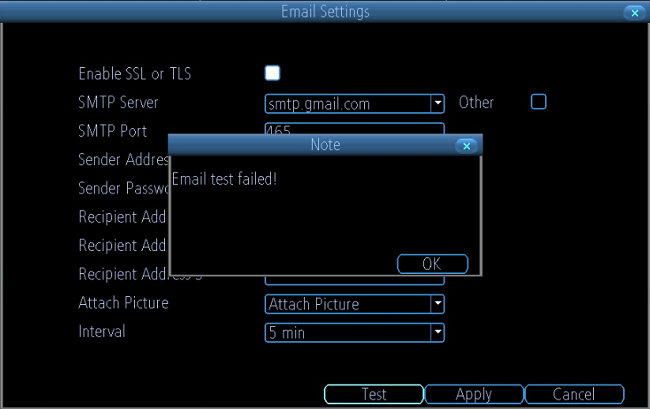
Cause 1. Incorrect email address or password.
Solution: Double-check your address and password to ensure that they are correct.
Cause 2. Incorrect SMTP Server & Port.
Solution: Google the SMTP Server & SMTP port of your email service provider and input the correct info. Then you may click on E-mail Test to see if it works.
Note: The SMTP Server and SMTP Port may vary depending on the mailbox that you are using. If you set Gmail as the Sender Address, you may leave the default SMTP Server (smtp.gmail.com) and default Port (465 when the SSL or TLS is enabled and 25 when the SSL or TLS is disabled) unchanged. However, if you set other mailboxes, such as Hotmail, Yahoo mail, as Sender Address, you will need to input the corresponding SMTP Server & SMTP port for the email test.
For your reference:
|
Email Service Provider |
SMTP Server |
SMTP Port (SSL or TLS Enabled) |
SMTP Port (SSL and TLS Disabled) |
|
Yahoo Email |
smtp.mail.yahoo.com |
465 or 587 |
25 |
|
Hotmail |
smtp.live.com |
587 |
25 |
|
MSN Email |
smtp-mail.outlook.com |
587 |
25 |
Cause 3. Your email service has disabled access to third-party software.
Solution: Go to your email account settings to enable less secure apps to access the account. See example of how to configuring gmail security settings.
Cause 4. Poor network connection.
Solution: Go to Network -> Advanced -> NTP to sync the NVR with the Internet time to see whether your Reolink device is properly connected to the Internet.
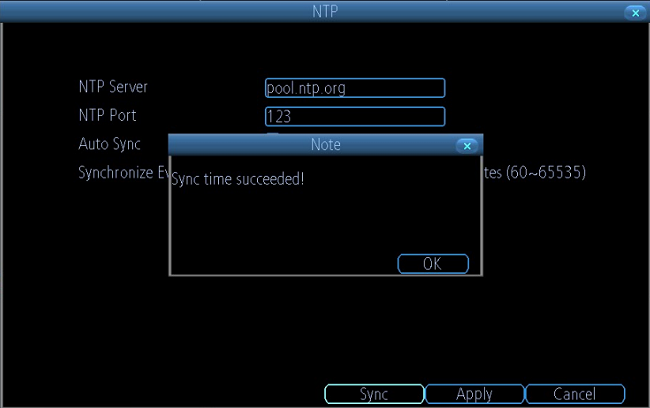
Sync time succeeded means that the NVR is successfully connected to the internet. Please restart the NVR and the router to see whether you can pass the email test. If it still doesn't work, please contact our support team for additional help.
Sync time failed means that the NVR is not connected to the internet. Please ensure that the cable is plugged in tightly and the indicator light is on (with the green light on and the yellow light blinking). Otherwise, please use another Ethernet cable and try again. If the problem persists, please check your network settings.
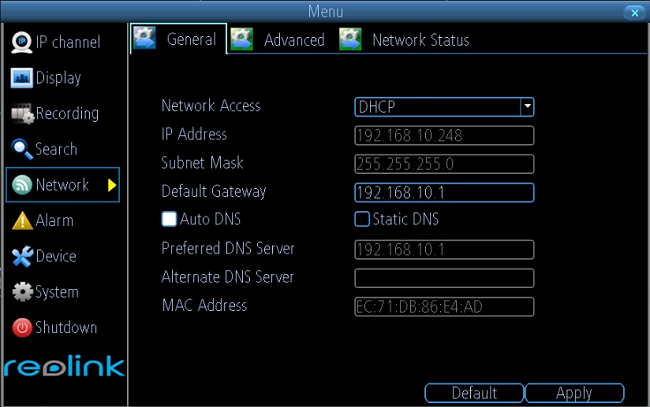
Cause 5. Improper network settings
Solution: Please go to Network -> General to check the internet settings. We suggest you to select DHCP as the Network Access, select Auto DNS, and then click Apply to save the settings.
Note: If you select Static, please ensure that both your device and the router that it is connected to have access to the Internet.
If the problem persists after going through the steps above, you may set other mailboxes as Sender Address and see whether you can pass the email test or contact our support team for additional help. Feel free to set any mailbox as the Sender Address as it is the Recipient Address that the emails are actually sent to.