The instructions below will tell you how to configure the record schedule for your cameras via a web browser.
Applies to: All Reolink cameras with Micro SD card slot (exclude battery-powered cameras, Reolink Lumus, Reolink E1, and Reolink E1 Pro).
Step 1. Log in to the camera via a web browser. Click the gear icon on the top right to get to the device settings page.
Step 2. Click Surveillance > Record. Turn on Enable Record.
Part 1. Configure an Alarm recording schedule.
Click Alarm, then tick the motion types of the alarm recording you want. Select Enable/Disable and click the grids (one for an hour) on the timetable. Blue means the motions of the selected alarm type will trigger the camera recording at that hour, while grey means none. Click Save if you finish setting up.
Notes:
- For cameras with smart detection, there are four detection types: any motion, person, vehicle, and pet. Tick to choose which types of recording you want the camera to record. If you choose Any Motion only, then it will only detect normal motions and you can't see Person, Vehicle, or Pet recording while playback.
- The detection types vary from different models of your camera, and some cameras (8MP and 12MP) support setting the recording for your pet. For some models which do not support smart detection, there is no detection type that can be chosen. The camera record all motion-triggered alarm events.
Part 2. Configure a Continuous recording schedule
Click Timer. Then select Enable/Disable and click the grids (one for an hour) on the timetable. Blue means the camera will record non-stop at that hour, while grey means none. Click Save if you finish setting up.
Part 3. Recording Schedule settings are slightly different for PoE/WiFi cameras without smart detection.
If you have PoE/WiFi cameras without smart detection such as RLC-511, the recording schedule will be a little bit different from other cameras.
- Turn on Enable Record.
- Click the Motion(alarm recording)/Timer(continuous recording)/None(no recording) button, and then click on the grids to enable/disable different recordings for that hour. They are blue, yellow and grey respectively.
- Click the Save button in the bottom right corner if you finish setting.
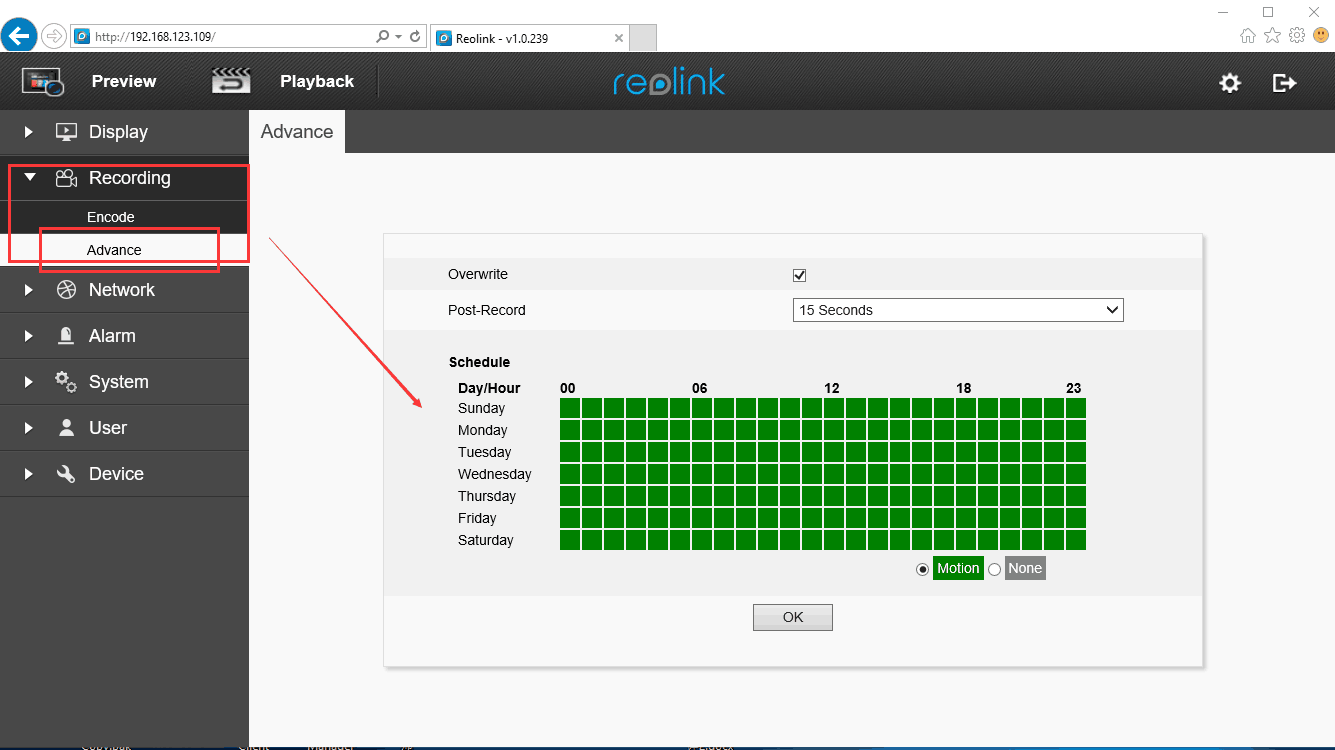
If the web interface of your camera is an old version, you can refer to the steps below.
Step 1. Log in to your camera via a web browser and go to the device settings page.
Step 2. Click on the grids to set the schedule as you need, then click OK to save the settings. One grid means one hour.

1. The Overwrite button is ticked by default, and under this mode, the new recordings will cover the old videos automatically if the micro SD card is full.
2. If you want to extend the record time after the motion events happened, you can choose the Post-Record button to set the time.
3. The green or blue grid means that the device will record to a micro SD card when motions are detected, while the white or grey one means “don’t record”.
4. The recording schedule of C1, C2, C1 Pro, C2 Pro, and cameras that are connected to NVR could be set as continuous recording, while other devices start to record only when motions are detected.
You may also configure the record schedule of Reolink cameras via Reolink App, Reolink Windows, or Mac Client. Check details in:
