Applies to: All Reolink Cameras(battery-powered cameras excluded)
This article will guide you on how to set the local recordings on your PC.
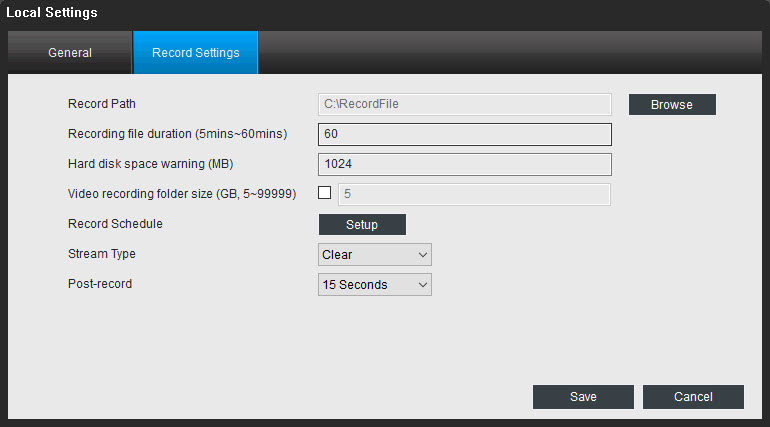
Step 1. Launch Reolink Client and go to Local Settings -> Record Settings page.

Step 2. Change the settings as you need and then click Save to save the settings:
- Record Path: You may find recordings from the Local Schedule Record and manual records under the Record Path. Click Browse to change it.
- Recording file duration (5mins~60mins): The shortest video length is 5 minutes and the maximum length is 60 minutes.
- Hard disk space warning (MB): A warning window will pop up on the bottom-right corner when the hard disk free space reaches the limit you have set here. At the same time, the camera will stop recording from that time on.
- Video recording folder size: This shows the limit size of the recording folder, it will begin to overwrite the recordings when the file reaches the limit you set here.
- Record Schedule: Click on Setup to enter the record schedule settings page. Tap on the grid to change the recording type (Normal, Motion, and None), then left-click and drag the mouse on the time grids to select the recording time.
- Stream Type: This shows the stream type of the videos saved in the Record Path.
- Post-record: This shows the time of post-record when the motion is triggered.
