
B500W
Product Introduction
Setup and Installation
User Manual
B500W
Specs
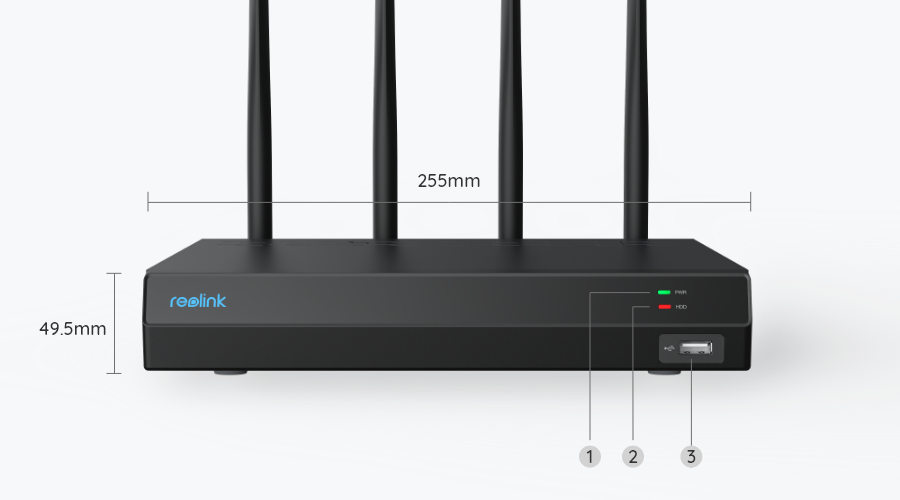
1
Power LED
2
HDD LED
3
USB Port
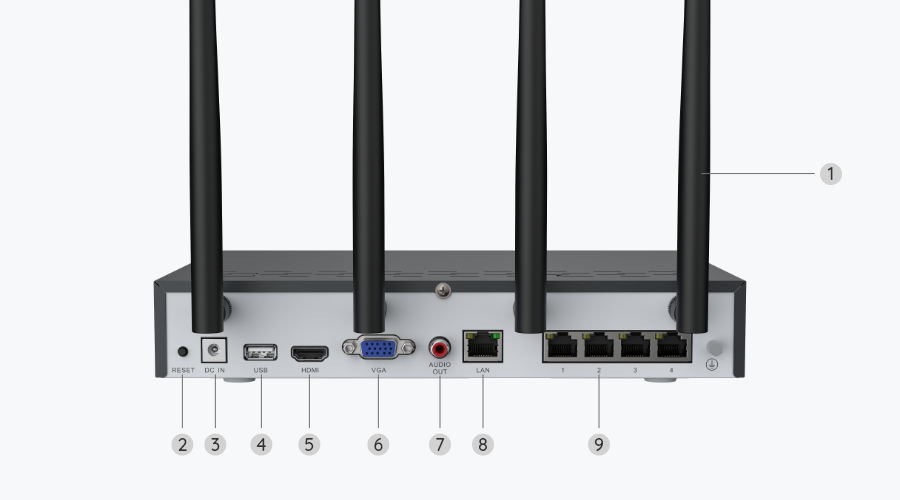
1
Antenna
2
Reset Button
3
Power Input
4
USB Port
5
HDMI Port
6
VGA Port
7
Audio Output
8
LAN Port (For Internet)
9
LAN Port (For IP Cameras)
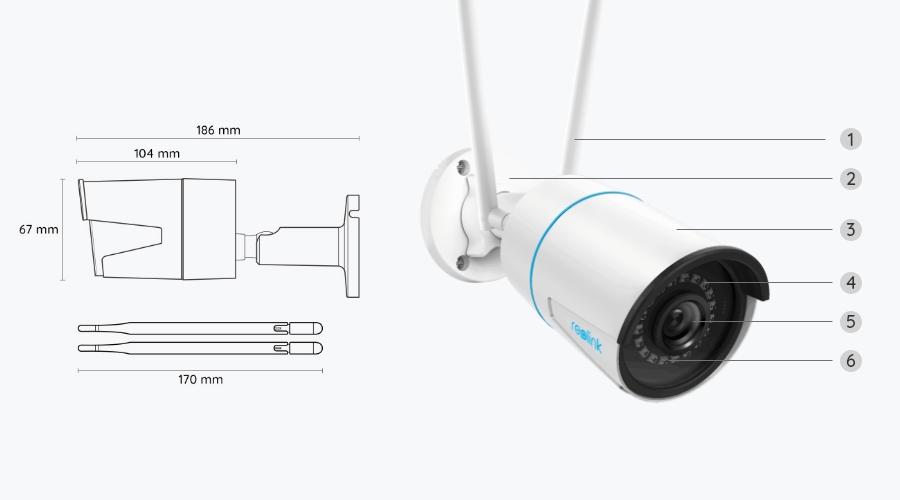
1
Antenna
2
Bracket
3
Metal-Aluminum Housing
4
IR LEDs
5
High-Resolution Lens
6
Daylight Sensor
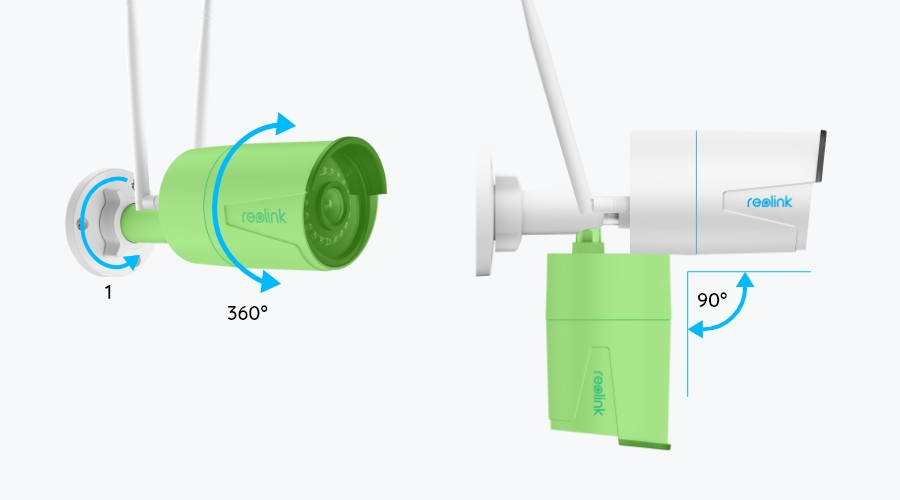
1. Turn the adjustment knob counterclockwise to loosen the bracket and adjust the camera in any direction.
2. After adjustment, rotate the adjustment knob back to secure and fix the camera in place.
2. After adjustment, rotate the adjustment knob back to secure and fix the camera in place.
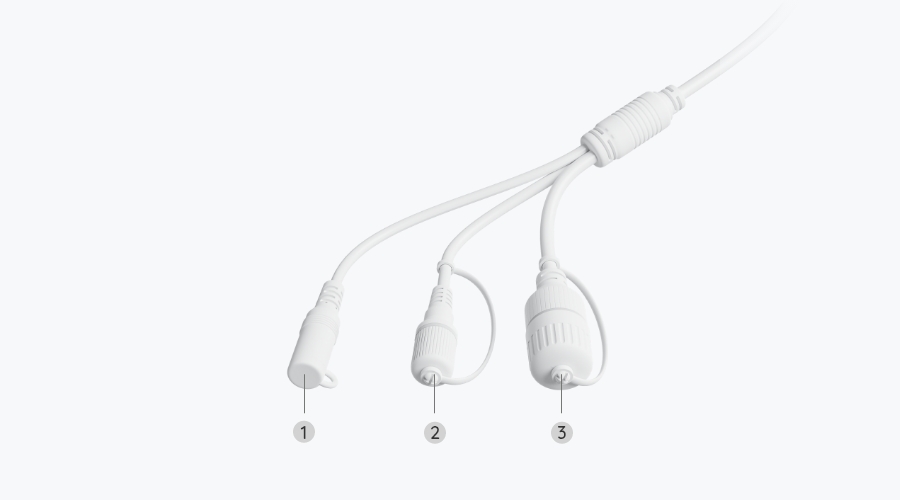
1
Power Port
2
Reset Button
3
Network Port
Helpful?
Yes
No
Thanks for your feedback!
B500W
B500W
B500W
B500W
B500W
B500W
B500W
B500W
B500W
B500W
B500W
B500W
B500W
B500W
B500W
B500W
B500W
B500W
B500W
B500W
B500W
B500W
B500W
B500W
B500W
B500W
B500W
B500W
B500W
B500W
B500W
B500W
B500W
B500W
B500W
B500W
B500W
B500W
B500W
B500W
B500W
B500W
B500W
B500W
B500W
B500W
B500W
B500W
B500W
B500W
B500W
B500W
B500W
B500W
B500W
B500W
B500W
B500W
B500W
B500W
B500W
B500W
B500W
B500W
B500W
B500W
B500W
B500W
B500W
B500W
Search for Firmware
Have issues upgrading? Please contact Reolink support.
Stay Informed about Firmware Updates
I've read and understood the Terms & Conditions and Privacy Policy, and I agree that Reolink keeps me up to date on news and exclusive offers.
Helpful?
Yes
No
Thanks for your feedback!
B500W
B500W
User Manual
Loading...
Helpful?
Yes
No
Thanks for your feedback!
B500W
B500W
B500W
B500W
B500W
B500W
B500W
B500W
B500W
B500W
B500W
B500W
B500W
B500W
B500W
B500W
B500W
B500W
B500W
B500W
B500W
B500W
B500W
B500W
B500W
B500W
B500W
B500W
B500W
B500W
B500W
B500W
B500W
B500W
B500W
B500W
B500W
B500W
B500W
B500W
B500W
B500W
B500W
B500W
B500W
B500W
B500W
B500W
B500W
B500W
B500W
B500W
B500W
B500W
B500W
B500W
B500W
B500W
B500W
B500W
B500W
B500W
B500W
B500W
B500W
B500W
B500W
B500W
B500W
B500W
B500W
B500W
B500W
B500W
B500W
B500W
B500W
B500W
B500W
B500W
B500W